Bellshatter Martial Artist
构建概览
LIVE UPDATE: CRITICAL HIT INTERACTION IS NOT WORKING - SEE VIDEO
IMPORTANT NOTE: This build makes use of new Ascendancy Skills and/or mechanics that aren't fully understood. The expected interactions aren't yet known to function, so follow at your own risk.
WORK IN PROGRESS, CHECK BACK FOR UPDATES
Build focused on hitting Hollow Focus Technique bells using Boneshatter to create 3 overlapping Shockwave hits in a large area.
Concept
Boneshatter creates a Shockwave when causing a Heavy Stun after hitting a target that's Primed for Stun. The bells created by Hollow Focus Technique are always Primed for Stun, and hits against them are always Critical Hits. Hollow Resonance Technique attaches a bell to your back which creates a Shockwave around you when another Skill deals a Critical Hit.
Using Boneshatter to hit a Hollow Focus bell will cause three Shockwaves, one from each bell and one from Boneshatter itself. Since the Boneshatter usage targeted the Hollow Focus bell, the hit which created the Shockwave is a guaranteed Critical Hit, which in turn creates a Critical Shockwave to deal extra Damage to all nearby targets. See video for more information!
Hollow Focus Bell Placement
One of the issues that may arise is the placement of Hollow Focus Technique bells since they are randomly placed at an interval within a 3 metre radius around you. This may be less of an issue for general map clearing, but we will still have a typical Boneshatter rotation available for the cases where the bell spawns in a disadvantageous position, such as behind us as we approach a pack. In these scenarios we can use Rolling Slam or Leap Slam into Boneshatter to clear.
For bossing this could pose more of an issue. As of right now, the 4th Ascension option is Runic Meridians, but if single target poses more of a problem than I expect it will, then Hollow Form Technique may be a good choice, as we'll be able to generate Power Charges from Critical Hits on the bells (combined with a Way of the Stonefist modifier), providing a much more reliable single target option.
Levelling
I will level using a Mace almost right away. Pathing on the tree may require a few Strength attribute nodes to be able to equip Maces.
Brink I is now a Level 1 Support Gem so we can grab it right away, along with a buffed Attack-time Rolling Slam to combo into Boneshatter. Mace Strike will do most of the heavy lifting early on for single target Damage.
Focus on upgrading your Two-Handed Mace as regularly as possible. Prioritize Physical Damage prefix modifiers, Attack Speed and Skill Levels, but any added Damage modifier will be useful early on. The same goes for Gloves and Rings with added Damage.
Defences
Since we'll be using a Two-Handed Mace, the plan is to utilise mostly pure Evasion gear along with a splash into Energy Shield scaling via Way of the Stonefist Gloves and a pure Energy Shield Helmet with Subterfuge Mask. I will also be experimenting with the new Deflection formula to see how it feels.
Attributes
Since this build will need to use all 3 Attributes to equip a Mace alongside Evasion and Energy Shield gear, we may have some affix pressure to deal with. Early on make sure you're focusing on Evasion gear so you can take Strength and Dexterity on the pathing nodes. Make sure to regularly check vendors for good gear with any Attribute rolls you can use.
If you're struggling for Attributes to equip the required gear or Skills, make sure you temporarily spec into some extra pathing Attribute nodes on the Passive Tree - you can always respec them later.
优缺点
优势
- Big Damage from Boneshatter Shockwave Crits
劣势
- Gameplay might suffer a bit due to random bell placement
版本变更
28/05/26 - Build Creation
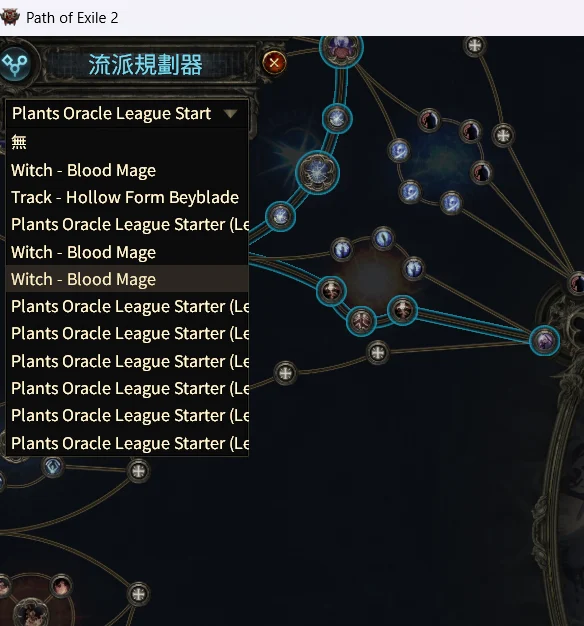
29/05/26 - Adding loadouts (ongoing)
终局变体
 七伤破 Boneshatter
 跃击 Leap Slam
 炽焰战吼 Infernal Cry
 风舞者 Wind Dancer
 幽灵舞步 Ghost Dance
 能量球调节 Charge Regulation
 吞噬 Devour七伤破 Boneshatter
 冲击震波Faster Attack
 轰动猛击 Rolling Slam
 锤打击 Mace Strike炽焰战吼 Infernal Cry
 灰烬之捷 Herald of Ash七伤破 Boneshatter冲击震波Faster Attack跃击 Leap Slam锤打击 Mace Strike炽焰战吼 Infernal Cry灰烬之捷 Herald of Ash七伤破 Boneshatter跃击 Leap Slam锤打击 Mace Strike炽焰战吼 Infernal Cry灰烬之捷 Herald of Ash风舞者 Wind Dancer七伤破 Boneshatter跃击 Leap Slam锤打击 Mace Strike炽焰战吼 Infernal Cry灰烬之捷 Herald of Ash风舞者 Wind Dancer七伤破 Boneshatter跃击 Leap Slam锤打击 Mace Strike炽焰战吼 Infernal Cry灰烬之捷 Herald of Ash风舞者 Wind Dancer
练级阶段
终局 阶段建议技能配置如下,主技能搭配辅助宝石按下方推荐插槽即可,具体打法详见上方“玩法/连招”说明。
终局 技能配置
七伤破 Boneshatter跃击 Leap Slam炽焰战吼 Infernal Cry风舞者 Wind Dancer幽灵舞步 Ghost Dance能量球调节 Charge Regulation吞噬 Devour第一章 阶段建议技能配置如下,主技能搭配辅助宝石按下方推荐插槽即可,具体打法详见上方“玩法/连招”说明。
第一章 技能配置
七伤破 Boneshatter冲击震波Faster Attack轰动猛击 Rolling Slam锤打击 Mace Strike炽焰战吼 Infernal Cry灰烬之捷 Herald of Ash第二章 阶段建议技能配置如下,主技能搭配辅助宝石按下方推荐插槽即可,具体打法详见上方“玩法/连招”说明。
第二章 技能配置
七伤破 Boneshatter冲击震波Faster Attack跃击 Leap Slam锤打击 Mace Strike炽焰战吼 Infernal Cry灰烬之捷 Herald of Ash第三章 阶段建议技能配置如下,主技能搭配辅助宝石按下方推荐插槽即可,具体打法详见上方“玩法/连招”说明。
第三章 技能配置
七伤破 Boneshatter跃击 Leap Slam锤打击 Mace Strike炽焰战吼 Infernal Cry灰烬之捷 Herald of Ash风舞者 Wind Dancer第四章 阶段建议技能配置如下,主技能搭配辅助宝石按下方推荐插槽即可,具体打法详见上方“玩法/连招”说明。
第四章 技能配置
七伤破 Boneshatter跃击 Leap Slam锤打击 Mace Strike炽焰战吼 Infernal Cry灰烬之捷 Herald of Ash风舞者 Wind DancerInterludes 阶段建议技能配置如下,主技能搭配辅助宝石按下方推荐插槽即可,具体打法详见上方“玩法/连招”说明。
Interludes 技能配置
七伤破 Boneshatter跃击 Leap Slam锤打击 Mace Strike炽焰战吼 Infernal Cry灰烬之捷 Herald of Ash风舞者 Wind Dancer装备推荐
- 攻击速度加快 22%22% increased Attack Speed
- 添加 35-59 物理伤害Adds 35 to 59 Physical Damage
- 物理伤害提高 198%198% increased Physical Damage
- +97 命中值+97 to Accuracy Rating
- +2 所有近战技能等级+2 to Level of all Melee Skills
- +33 智慧+33 to Intelligence
- +45% 火焰 抗性+45% to Fire Resistance
- +60 最大能量护盾+60 to maximum Energy Shield
- 能量护盾提高 91%91% increased Energy Shield
- +261 闪避值+261 to Evasion Rating
- +199 最大生命+199 to maximum Life
- +30 敏捷+30 to Dexterity
- +40% 火焰 抗性+40% to Fire Resistance
- 闪避值提高 91%91% increased Evasion Rating
- +119 最大生命+119 to maximum Life
- +27 敏捷+27 to Dexterity
- +35% 火焰 抗性+35% to Fire Resistance
- +11% 混沌抗性+11% to Chaos Resistance
- 添加 11-20 物理伤害到攻击Adds 11 to 20 Physical Damage to Attacks
- +119 最大生命+119 to maximum Life
- +30% 冰霜 抗性+30% to Cold Resistance
- +35% 闪电 抗性+35% to Lightning Resistance
- 闪避值提高 91%91% increased Evasion Rating
- 移动速度提高30%30% increased Movement Speed
- +149 最大生命+149 to maximum Life
- +33 力量+33 to Strength
- +35% 冰霜 抗性+35% to Cold Resistance
- +35% 闪电 抗性+35% to Lightning Resistance
- +20 所有属性+20 to all Attributes
- +149 最大生命+149 to maximum Life
- +35% 冰霜 抗性+35% to Cold Resistance
- +35% 闪电 抗性+35% to Lightning Resistance
- 闪避值提高 44%44% increased Evasion Rating
- +99 最大生命+99 to maximum Life
- +33 智慧+33 to Intelligence
- +40% 火焰 抗性+40% to Fire Resistance
- 添加 11-20 物理伤害到攻击Adds 11 to 20 Physical Damage to Attacks
- 物理攻击伤害的 6.9% 转化为魔力偷取
- 添加 2-47 闪电伤害到攻击Adds 2 to 47 Lightning damage to Attacks
- +99 最大生命+99 to maximum Life
- +30 力量+30 to Strength
- +40% 冰霜 抗性+40% to Cold Resistance
- 物理攻击伤害的 7.9% 转化为生命偷取
- 添加 9-16 物理伤害Adds 9 to 16 Physical Damage
- 物理伤害提高 64%64% increased Physical Damage
- 攻击速度加快 7%7% increased Attack Speed
- 添加 4-8 物理伤害到攻击Adds 4 to 8 Physical Damage to Attacks
- 移动速度加快 10%10% increased Movement Speed
- 添加 1-15 闪电伤害到攻击Adds 1 to 15 Lightning damage to Attacks
- 添加 12-21 物理伤害Adds 12 to 21 Physical Damage
- 物理伤害提高 84%84% increased Physical Damage
- +1 所有近战技能等级+1 to Level of all Melee Skills
- +69 最大生命+69 to maximum Life
- +25% 冰霜 抗性+25% to Cold Resistance
- +29 最大生命+29 to maximum Life
- 添加 8-13 火焰伤害到攻击Adds 8 to 13 Fire damage to Attacks
- +20% 冰霜 抗性+20% to Cold Resistance
- 移动速度加快 15%15% increased Movement Speed
- +29 最大生命+29 to maximum Life
- +20% 火焰 抗性+20% to Fire Resistance
- 添加 1-27 闪电伤害到攻击Adds 1 to 27 Lightning damage to Attacks
- +19 最大生命+19 to maximum Life
- +20% 火焰 抗性+20% to Fire Resistance
- 添加 15-26 物理伤害Adds 15 to 26 Physical Damage
- 物理伤害提高 109%109% increased Physical Damage
- +2 所有近战技能等级+2 to Level of all Melee Skills
- 攻击速度加快 10%10% increased Attack Speed
- +99 最大生命+99 to maximum Life
- +20 敏捷+20 to Dexterity
- +25% 火焰 抗性+25% to Fire Resistance
- 闪避值提高 67%67% increased Evasion Rating
- +59 最大生命+59 to maximum Life
- +25% 冰霜 抗性+25% to Cold Resistance
- 移动速度加快 20%20% increased Movement Speed
- +84 最大生命+84 to maximum Life
- +27 力量+27 to Strength
- +7% 混沌抗性+7% to Chaos Resistance
- 添加 1-32 闪电伤害到攻击Adds 1 to 32 Lightning damage to Attacks
- +24 力量+24 to Strength
- +30% 闪电 抗性+30% to Lightning Resistance
- 添加 15-26 物理伤害Adds 15 to 26 Physical Damage
- 物理伤害提高 133%133% increased Physical Damage
- +46 命中值+46 to Accuracy Rating
- +2 所有近战技能等级+2 to Level of all Melee Skills
- +119 最大生命+119 to maximum Life
- +24 敏捷+24 to Dexterity
- +15% 混沌 抗性+15% to Chaos Resistance
- 闪避值提高 91%91% increased Evasion Rating
- +99 最大生命+99 to maximum Life
- +16 敏捷+16 to Dexterity
- +25% 闪电 抗性+25% to Lightning Resistance
- 移动速度加快 25%25% increased Movement Speed
- +119 最大生命+119 to maximum Life
- +27 力量+27 to Strength
- +20% 火焰 抗性+20% to Fire Resistance
- 攻击速度加快 19%19% increased Attack Speed
- 添加 21-37 物理伤害Adds 21 to 37 Physical Damage
- 物理伤害提高 134%134% increased Physical Damage
- +2 所有近战技能等级+2 to Level of all Melee Skills
- +99 最大生命+99 to maximum Life
- +20% 冰霜 抗性+20% to Cold Resistance
- +30% 闪电 抗性+30% to Lightning Resistance
- 移动速度加快 25%25% increased Movement Speed
天赋树和点法详情请前往原贴查看,需科学上网。